Splices
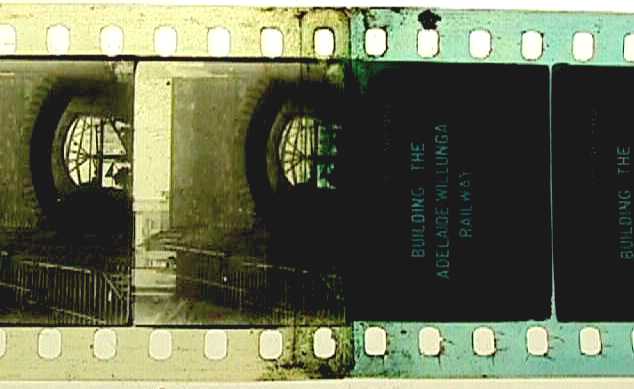
A splice is when a film has to be cemented or taped together because of breakage or as part of the editing process. They are usually noticeable.
Splices join sections of film together. There are various methods of splicing film. Ensure that splices are correctly aligned, especially shrunken material, carefully trim edges to eliminate sharp corners and bumps. The NFSA uses the following:
- Tape splices
- Cement splices
- Ultrasonic splices
- Hand splices
Tape splices
Tape splices are recognized by the ends being butted together (sometimes referred to as butt splice), the whole splice is held together across its width by adhesive tape. Tape joins are weakened by ultrasonic cleaning techniques and if the film is old, the splices in the film will usually need restoration.
Adhesive tape splices are not recommended as, over time, the adhesive will bleed out under the tape and spread to areas of the film where it is not required, causing the film surfaces to adhere to each other. This a problem when winding or projecting and may cause damage if care is not taken.
Tape splices should not be used on preservation material, the adhesive can leach and damage surrounding frames. If material cannot be cement spliced then a tape splice may be used to save image and/or sound frames. Tape splices do not overlap, they are merely ‘butted’ together. The following steps are used to perform a tape splice:
1. Trim both sections of film on a frameline, to maintain rack
2. Place both sections into tape splicer
3. Working from one edge to the other, apply the splicing tape to the film using firm pressure
4. If air bubbles form under the tape either remove the tape and re-do splice or use a cotton bud to push the air bubble out from under the tape.
5. Test the splice
Cement splices
Cement splices are characterised by the film overlapping across its width in a strip a couple of millimeters wide.
Cement splices are the preferred method for splicing preservation, nitrate or any original material. This method uses film cement to bond two sections of film together. Cement splices can be done by hand or by using a film splicer. The following steps are used to perform a cement splice:
1. Trim both sections of film on a frameline, to maintain rack
2. Scrape the emulsion off one side of film and scrape the base on the other section
3. Place both sections in the splicer
4. Apply film cement evenly to one section of film then clamp the other section on top of it
5. Wipe away any excess cement and wait for approx. 30 seconds before releasing from splicer
6. The frame line area of both sections of film should be overlapped
7. Test the splice

Ultrasonic splices
Ultrasonic splices are used mainly on polyester based films. These splices are considered suitable for preservation material. No tape or cement is used, the film is simply welded together. The following steps are used to perform a ultrasonic splice:
1. Trim both sections of film on a frameline, to maintain rack
2. Place both sections onto the ultrasonic splicer, then press the start button
3. The splice will be done automatically
4. Test the splice
Hand splices
Hand splices are usually performed when films are too shrunken to fit onto a splicer. The following steps are used to perform a hand splice:
1. Trim both sections of film on a frameline, to maintain rack
2. Scrape the emulsion off one side of film and scrape the base on the other section
3. Place the two sections of film emulsion down on several pieces of paper with the two ends overlapping in the position that they are to be spliced
4. Use crepe tape or weights to hold the film sections into position before cementing
5. Lift one of the sections and evenly apply film cement
6. Lower this section onto the other section and press down firmly for approximately 30 seconds
7. The paper should absorb any excess cement
Testing a splice
Splices need to be tested to see if they will endure cleaning machine, printers and projectors. Any splices that break or come apart during this process should be re-spliced. To test a splice, wear cotton gloves to hold the film on either side of the splice and test its ability to loop and twist. Splices should not peak at the top. Check cement and ultrasonic splices for the following:
1. Opaque sections on a splice are an indication that the splice has not bonded effectively. These splices may have to be re-spliced.
2. Ensure that the corners of each splice have bonded effectively. Corners can catch during printing or cleaning and rip the film. Any splices with jagged corners should be separated and re-spliced.
3. Narrow splices, less than half a perforation pitch, will usually break during looping and twisting. These splices should be separated and re-spliced with either a tape splice or a cement splice.
4. Wide splices, more than one perforation pitch, will not form an even loop. This may cause the film to break or jam during printing and the splices can show when film is projected. These splices should be separated, trimmed and re-spliced.
5. Ensure that there are no jagged corners on splices and trim edges if necessary.
Separating a splice
Most splices can be easily separated by lifting a corner of the splice with a thumbnail or scalpel blade. Once one corner has been lifted, slide the back, blunt side of the scalpel blade along the inside of the splice to separate it.
Shrunken/non-shrunken film splices
Splices between very shrunken and less shrunken film (e.g. where leaders join the film). If the splice is misaligned and the perforations do not match up, or only match on one edge, then you should choose the side where there is the least amount of discrepancy in the perforation alignment for the splices; this will ensure that the printer will not tear through the next section of perforations or the film. This is particularly important for silent material but not so critical for composite materials where the joins are centered to allow for printing from either end.
Silent film
Line up the perforations on the drive side. Trim the non-drive side with an even taper covering 1-2 frames and ensure a smooth edge without bumps.
Composite films
Centre the join so that an equal amount of film overlaps each edge of the shrunken material and taper both sides evenly over 1-2 frames, as above.
The National Film and Sound Archive of Australia acknowledges Australia’s Aboriginal and Torres Strait Islander peoples as the Traditional Custodians of the land on which we work and live and gives respect to their Elders both past and present.


