
https://nginx-develop-nfsa2.govcms7.amazee.io/sites/default/files/2024-04/Singoring%201000x745.jpg
There are always challenges with the conservation of films that have completed their life cycles many decades ago. The job of the Audiovisual Conservation Laboratory (AVCO) is to come up with innovative ways to restore the film stock so that it can be handled by current methods of preservation. The following describes how we managed to get century old film from the Lumière collection to work alongside modern printing technology.
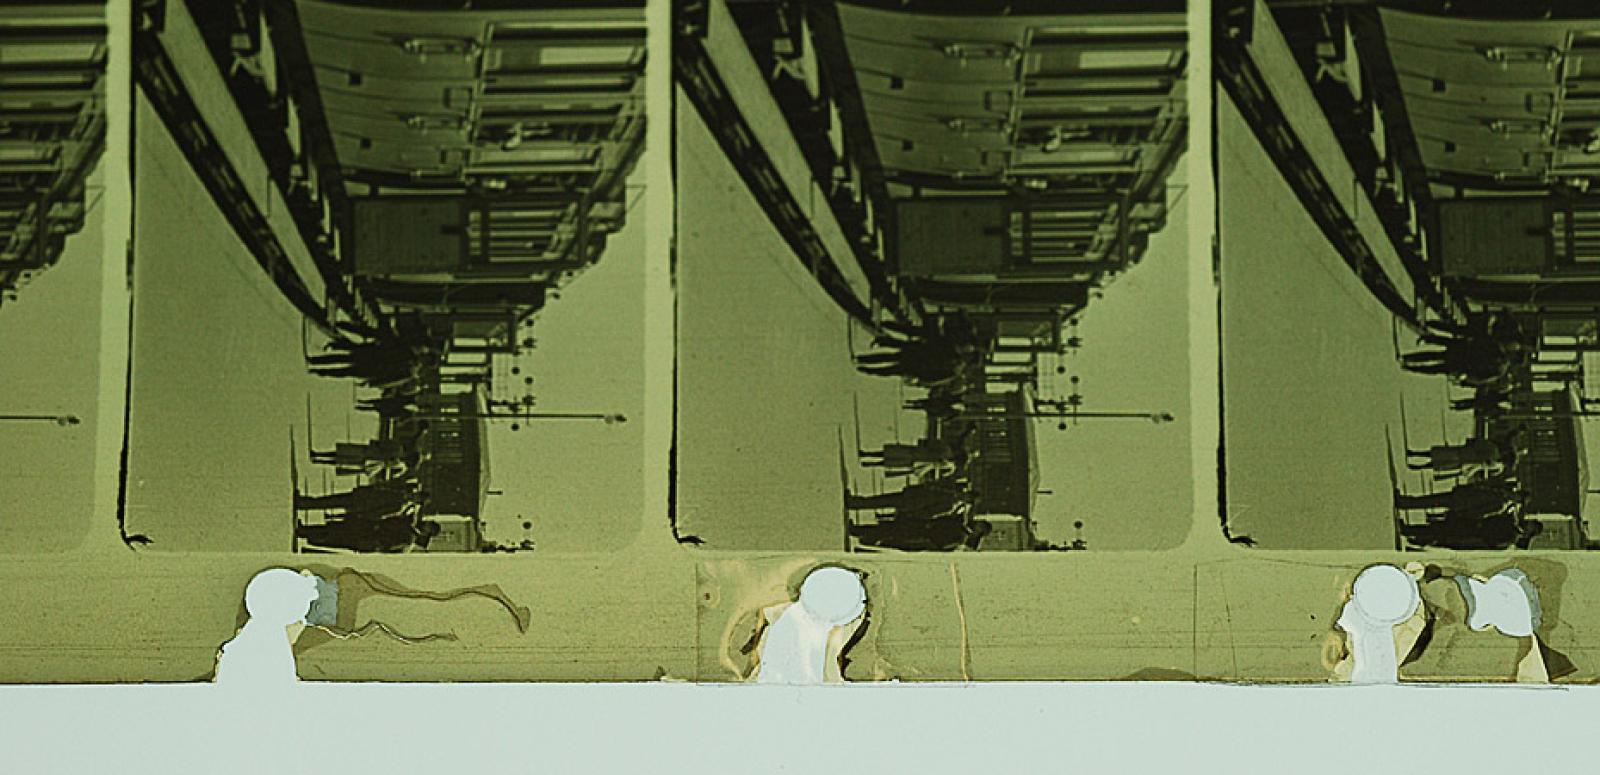
Firstly, the film stock was approximately 115 years old. As such, these films were very brittle and most of the perforations (the holes in the side of the film) were broken. This meant that the majority of perforations needed to be repaired or reinforced with splicing tape.
The second problem we encountered was that Lumière films do not have standard perforations. Back in the day (circa 1895), the Lumière brothers used a 35mm film that had one circular perforation per frame. This approach was not popular with other film companies, and the developing industry soon settled on standards of four perforations (perfs) per frame.
By the time the need for conserving these films came around in 2011, there were no mass-produced film repair tools which could cope with Lumière stock. This meant that we needed to develop a new approach for cleanly cutting out the circular perforations for use in a Lumière-compatible printing gate. Our printing gate had been custom-made by the NFSA’s resident machinist and engineer, Wayne Young.
After experimenting with several different approaches, these were the steps taken during the films repair to perforations:
Step-by-step repair to Lumière film stock perforations
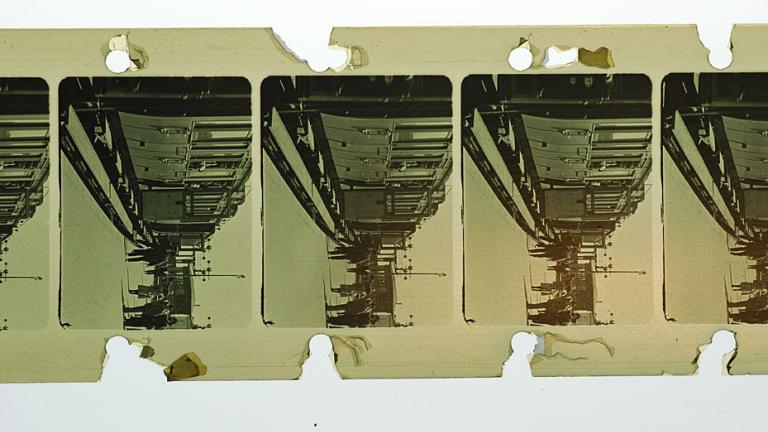
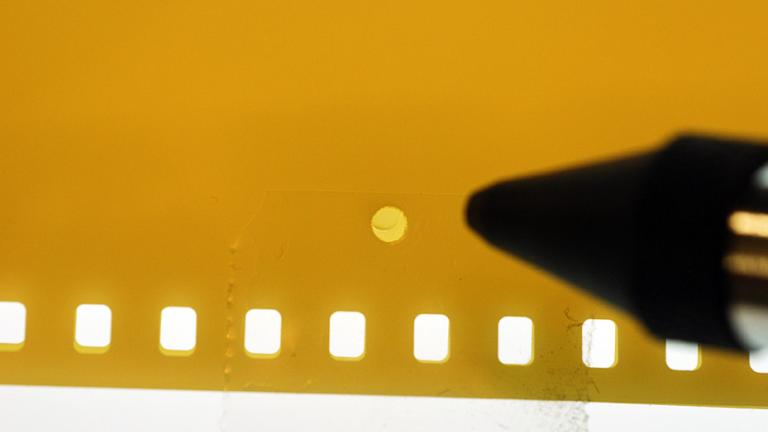
Sample of Lumière film. Note the damaged perforations.
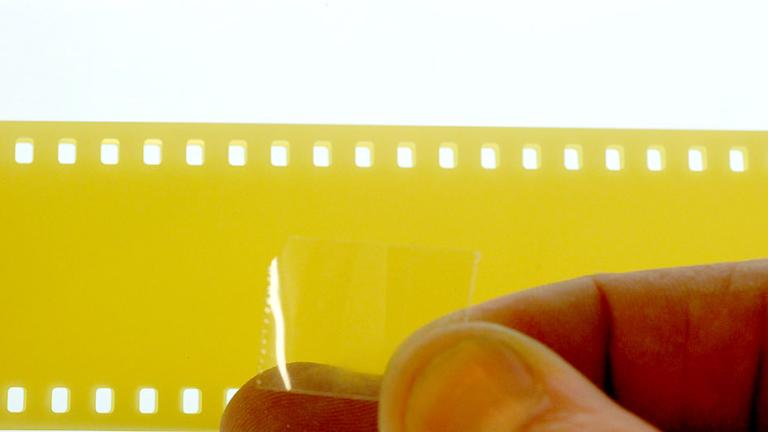
To repair the film, we cut off a small piece of clear splicing tape and placed it onto some scrap film stock.
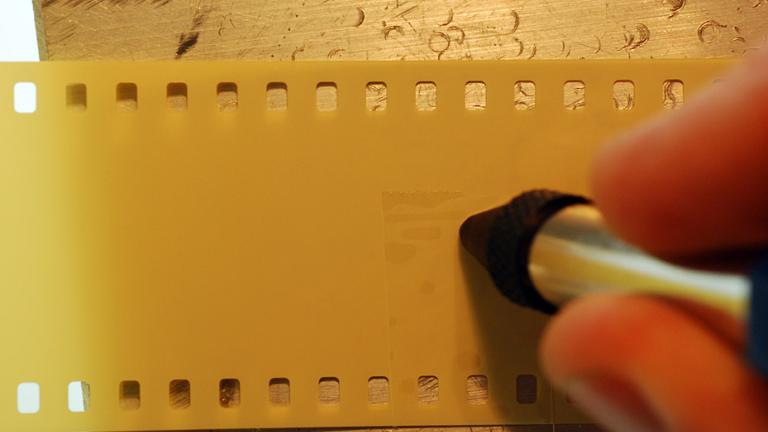
We then used a 2.5mm hole punch to cut a Lumière perforation-sized hole in the spicing tape. We placed a block of soft metal (aluminium) underneath the film stock to help protect the edge of the hole punch.
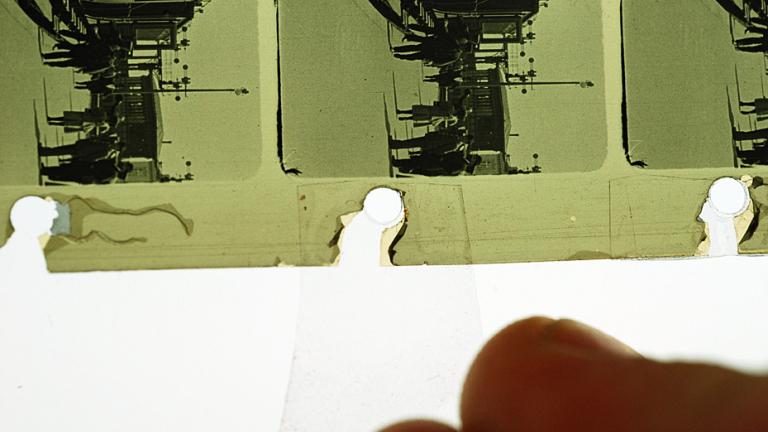
Hole successfully punched! (metal block removed for ease of viewing).
Note that the tape has been trimmed so that the top edge does not cover any part of the actual film frame. This is because the edge of the slicing tape may be visible when reprinting the film onto new stock.
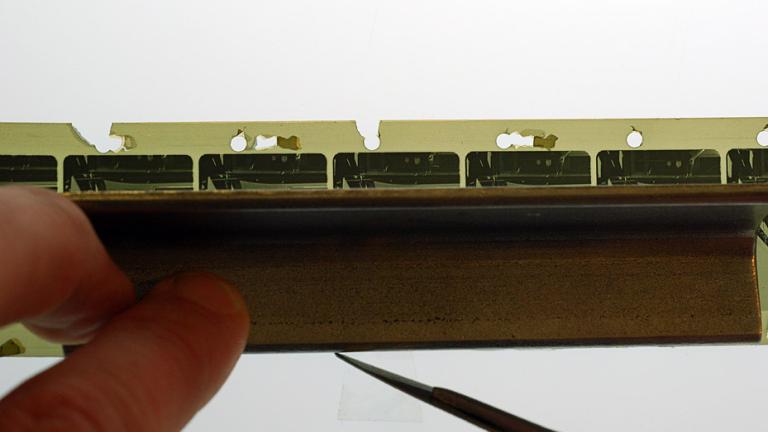
Using a metal edge as a guide, we trimmed the splicing tape so it is in line with the edge of the film.

Voila! The perforation has been repaired. Well, almost. For perfs where sections of the film is missing (as opposed to splits or cracks), it is best to repeat the process on the other side.
Mould, vinegar odours and baby spiders; just another work day for film curators.
The story behind the photochemical restoration of the Corrick Collection.
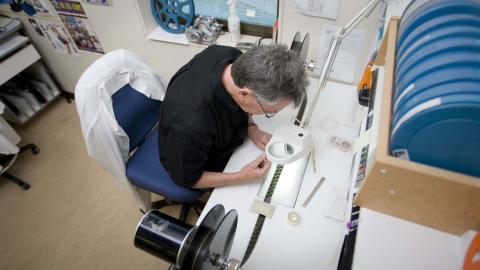
NFSA conservator Shingo Ishikawa and digitisation specialist Darren Weinert talk about cinema slides and their history, manufacture and preservation.
The National Film and Sound Archive of Australia acknowledges Australia’s Aboriginal and Torres Strait Islander peoples as the Traditional Custodians of the land on which we work and live and gives respect to their Elders both past and present.